Executive summary
Allergen control remains one of the most scrutinized and high‑impact areas in Food safety. Swabbing programs are widely used to verify cleaning effectiveness, but only a validated approach proves that your cleaning and sanitation process consistently removes allergenic residues to a level that keeps consumers safe and protects your brand. Validation translates intent into evidence: it turns a cleaning SOP into a scientifically demonstrated control.
This article explains why validation matters, what “good” looks like, and how to stand up a robust, defensible allergen swabbing validation program—complete with a step‑by‑step method, worked examples, and practical tips. We’ll also show how modern food safety software and Food traceability software streamline execution, trending, and audit‑readiness across sites.
What is allergen swabbing?
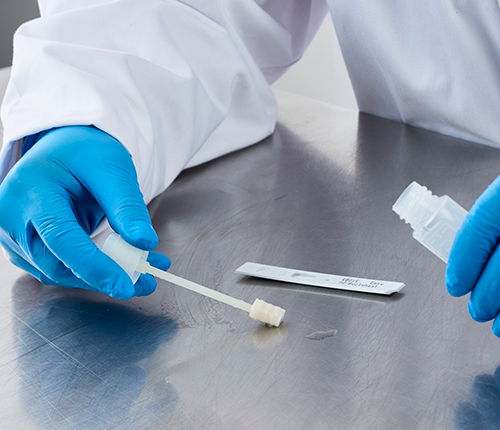
Allergen swabbing uses surface sampling and analytical testing to detect the presence of allergenic residues after cleaning and before production restarts. Common targets include milk, egg, peanut, tree nuts, soy, sesame, gluten/wheat, fish, and shellfish. Swabs are taken from food‑contact surfaces (e.g., belts, hoppers, fillers, slicers), near‑food surfaces (e.g., framework, guards), and sometimes environmental sites that can harbor residues (e.g., drains, floors in high‑risk zones).
Swabbing is most useful when it’s part of a layered strategy:
-
Validation: Prove the cleaning process can remove allergen residues under worst‑case conditions.
-
Verification: Routinely check that the validated process has been performed correctly each time.
-
Monitoring: Observe in‑process parameters (time, temperature, concentration, mechanical action) that signal your cleaning is on track.
Validation vs. verification—why the distinction matters
Verification answers: Did we follow the process today?
Validation answers: Is the process capable—reliably and repeatedly—of achieving the intended outcome under real‑world, worst‑case conditions?
Both are essential, but validation is the foundation. Without it, you might verify a procedure flawlessly and still leave hazardous residues if the underlying procedure is incapable. For leaders, validation mitigates systemic risk: it reduces the likelihood of recalls, protects brand equity, and provides confidence that scaling production or adding SKUs will not introduce latent allergen risk.
When should you validate allergen cleaning and swabbing?
-
Launching a new product with a novel allergen.
-
Commissioning new equipment or changing line configuration.
-
Switching detergents, sanitizers, or cleaning methods (e.g., wet vs. dry).
-
Significant change in soil load (e.g., higher fat, baked‑on residues).
-
After repeated verification failures or near‑misses.
-
At a defined frequency (e.g., annual) to confirm continued capability.
Choosing the right analytical tools
Different analytical methods answer different questions. Smart programs often combine them:
-
Allergen‑specific ELISA: High specificity; quantifies ppm levels of target proteins (e.g., peanut, milk). Ideal for validation endpoints.
-
Lateral flow (LFD) allergen devices: Rapid, qualitative/semiquantitative presence/absence screening at practical action levels.
-
Total protein swabs: Detect residual protein broadly, but not allergen‑specific. Useful as a proxy for gross residues during verification—not sufficient alone for validation.
-
ATP tests: Indicate organic residue/bioburden, fast and sensitive for hygiene, but not correlated to allergen presence. Use as a hygiene monitor, not an allergen endpoint.
Tip: Align method sensitivity with product risk and label claims. If your risk assessment demands “non‑detect” at a test’s LOD (limit of detection), define that explicitly (e.g., milk ELISA < 2.5 ppm casein equivalent).
Step‑by‑step: How to validate an allergen swabbing program
1) Define scope and acceptance criteria
Clarify the products, allergens, equipment, and cleaning method to be validated. Write explicit, measurable acceptance criteria such as:
-
All peanut ELISA swabs on defined food‑contact points: non‑detect at LOD ≤ 2.5 ppm.
-
All total protein swabs at sentinel locations: ≤ 20 µg protein per swab (as a hygiene adjunct).
-
No visual soil on inspected surfaces.
Define what constitutes a pass/fail for the overall validation (e.g., three successful, consecutive runs meeting all endpoints).
2) Map residues and select worst‑case scenarios
Conduct a risk‑based line walk.
-
Identify niches: dead legs, gasket lips, threads, seals, scraper edges, CIP shadowed areas, belt undersides, fillers, combi‑ovens.
-
Prioritize soils: sticky, high‑fat, baked‑on, viscous matrices that protect proteins.
-
Choose worst‑case products and sequences (e.g., high‑load allergen SKU → lowest‑tolerance non‑allergen SKU).
3) Write the cleaning process you intend to validate
Document chemistry, concentration, time, temperature, mechanical action, tool selection, disassembly steps, and drying/flush protocols. Include who performs what and which records are required. Validation tests the actual SOP, not an idealized version—so be precise.
4) Select methods and swab locations
Choose allergen‑specific assays for the target and add adjunct hygiene tools as appropriate. Establish a sampling plan:
-
Food‑contact (e.g., 8–12 swabs): belts (start/middle/end), hoppers, scraper blades, nozzles, change parts, CIP return.
-
Adjacent zones (e.g., 4–6 swabs): framework, guards, control panels.
-
Environmental (optional): drains or floors in high‑risk areas to understand spread potential.
Pre‑define sentinel sites—the most difficult‑to‑clean locations you will trend over time.
5) Determine timing and sequence of swabs
For each validation run, collect:
-
Pre‑clean baseline: optional, confirms heavy initial load.
-
Post‑rinse (or pre‑detergent): shows soil removal effectiveness.
-
Post‑clean, pre‑sanitizer: critical data point for detergent step.
-
Post‑sanitizer/dry: your final acceptance timepoint.
-
Start‑up product testing (if needed): first‑off or “flush” testing for carryover.
6) Establish sample numbers and statistical confidence
Aim for replication across time (e.g., 3 full validation cycles) and space (multiple sites per unit). Use consistent swab areas (e.g., 10×10 cm) and standardized swabbing technique and pressure to minimize variability. When feasible, calculate confidence that the process clears residues below your threshold with the chosen sampling intensity.
7) Train and standardize technique
Train sanitors and QA techs on the SOP, swabbing technique, chain of custody, and interpretation of faint LFD bands. Use pre‑labelled kits and field blanks to detect contamination introduced during sampling.
8) Execute validation runs and document thoroughly
Record the who/what/when/where:
-
Cleaning variables: chemistry lot, concentration, contact time, water temp, tools, disassembly checklist.
-
Swab metadata: location ID, surface type, area size, timepoint, analyst, kit lot/expiry.
-
Deviations and corrective actions.
9) Analyze results and set operational verification
If all acceptance criteria are met across your defined runs, approve the SOP as validated. Then design a lean verification program for day‑to‑day use that focuses on sentinel sites and practical tools (e.g., LFD at high‑risk points plus routine hygiene metrics). If not met, conduct a gap analysis (chemistry strength, contact time, mechanical action, disassembly completeness) and re‑test.
10) Trend, review, and re‑validate when things change
Trend pass rates by site, shift, product, and season. Investigate special‑cause variation. Re‑validate whenever you introduce new allergens, change equipment/chemistry, or observe a sustained increase in failures.
Worked examples
Example 1: Peanut control in a high‑throughput cookie line
Context: Plant produces peanut‑containing cookies on Monday and non‑allergen SKUs Tuesday–Friday on the same line. Changeover must be completed in 6 hours.
Risk drivers: Oily, sticky matrices; baked‑on residues on oven exit transfer, wire‑cutters, and belt fibers.
Plan:
-
Acceptance criteria: All peanut ELISA swabs at 12 defined food‑contact locations are non‑detect at ≤2.5 ppm after complete cleaning; visual clean required; two LFD peanut tests at the most challenging points must be negative.
-
Sampling: 3 validation cycles over 3 weeks; timepoints at post‑rinse, post‑detergent, and final post‑sanitizer/dry.
-
Key changes tested: New alkaline detergent with surfactant booster; mechanical agitation added for the wire‑cutter assembly; belt cleaned with approved foaming system plus dwell time increase from 10 to 15 minutes.
Outcome: Cycle 1 showed occasional weak LFD positives at the belt splice after detergent; ELISA cleared after extended dwell plus a second rinse. SOP updated to include belt splice focus clean and longer dwell. Cycles 2–3 passed all endpoints. Verification program: 3 LFD tests per changeover (wire‑cutter, belt splice, post‑oven transfer) and weekly ELISA at rotating sentinel points.
Example 2: Milk allergen in a ready‑to‑eat salad facility (open equipment)
Context: Milk‑containing dressings run once weekly; same depositor feeds dairy‑free lines the next day.
Plan:
-
Acceptance criteria: Casein ELISA non‑detect at ≤2.5 ppm on 10 food‑contact points (depositor nozzle, pump head, hopper weld seam, quick‑disconnects). ATP used as hygiene monitor only.
-
Sampling: Validation across three operators, two shifts, and two detergent brands to represent realistic variability.
-
Controls: Field blanks and positive controls to verify kit performance; pre‑clean positives collected to confirm initial load.
Outcome: First cycle failed at the quick‑disconnect O‑ring groove. Root cause: incomplete disassembly. SOP revised with a tool‑aided disassembly checklist and added brush head. Subsequent cycles passed. Verification: LFD on the nozzle and O‑ring groove each changeover; monthly ELISA rotation across all 10 sites.
Example 3: Soy on a chocolate enrobing line (lecithin carryover)
Context: All products contain soy lecithin, but a subset of SKUs is labelled “soy‑free” for specific markets and must run after soy‑free emulsifier trials.
Plan:
-
Acceptance criteria: Soy ELISA non‑detect at ≤2.5 ppm on 8 sites including the enrober pan, weir, return pump, and belt underside.
-
Technique: Warmed water flush to mobilize fats, then alkaline detergent at elevated temperature, followed by acid rinse to break mineral films and a final sanitizer step.
Outcome: Early failures on the return pump cavity indicated temperature too low during alkaline wash to solubilize fats. Increasing wash temperature by 10–15°C and extending contact time cleared residues. Verification focuses on return pump and weir; trending shows higher risk in winter startup when room temperatures are lower—triggering a seasonal pre‑heat control.
Common pitfalls—and how to avoid them
-
Relying on ATP or total protein alone. Neither is allergen‑specific. Use them as hygiene indicators, but confirm with allergen‑specific methods for validation.
-
Not sampling the true niches. Flat, accessible areas tend to pass. Focus on crevices, gaskets, dead legs, and belt splices.
-
Inconsistent swabbing technique. Standardize area size, pressure, strokes, and moistening; train and audit.
-
Assuming “negative” means “safe” without context. Understand LOD and LOQ; a non‑detect is meaningful only relative to method sensitivity and your risk assessment.
-
Skipping operator variability. Validate across shifts, operators, and realistic time pressures to reflect real‑world performance.
-
Forgetting re‑validation triggers. New SKUs, chemistry changes, equipment modifications, and repeated failures all require re‑assessment.
-
Poor documentation. If it isn’t documented, it didn’t happen. Capture metadata and keep raw and summarized results easily retrievable.
Templates you can adapt
A. Sample acceptance criteria matrix
| Location ID | Surface/Part | Method | Acceptance criterion |
|---|---|---|---|
| F‑01 | Wire‑cutter blade | Peanut ELISA | ND at ≤2.5 ppm |
| F‑02 | Belt splice | Peanut LFD | Negative band |
| F‑03 | Hopper weld | Total protein | ≤ 20 µg/swab |
| Z‑01 | Framework under hopper | Peanut LFD | Negative band |
B. Validation run checklist (abridged)
-
Pre‑clean visual inspection completed; photos captured.
-
Chemistry lot numbers, concentrations, contact times recorded.
-
Disassembly checklist completed and signed by two people.
-
Swab kits logged (lot/expiry); field blanks included.
-
Swab map (with exact 10×10 cm grids) attached.
-
Deviations recorded; corrective actions noted.
-
Data entered and trended; run conclusion documented.
Metrics to monitor and trend
-
% Pass at final acceptance timepoint (by line, shift, and product family).
-
Swab positivity heatmaps (sites with recurrent issues).
-
Time‑to‑clear (start of clean → last passing swab): a productivity and risk metric.
-
Seasonality patterns (e.g., winter fat congealing increasing fails).
-
Operator/shift variability (to target training).
Leverage food safety software to automate data capture, flag out‑of‑spec results in real time, and produce trend charts for management review. Integrate with Food traceability software to link allergen validation status to release decisions and to quickly pull evidence during customer or regulatory reviews.
Leadership perspective: building assurance at scale
For executives, allergen validation is more than a QA activity—it’s enterprise risk management. A standardized, validated cleaning program across sites enables:
-
Consistent outcomes regardless of line, shift, or geography.
-
Faster changeovers without sacrificing safety.
-
Confident SKU expansion (including “free‑from” claims) supported by evidence.
-
Lower recall likelihood and stronger customer trust.
Ask for monthly dashboards showing pass rates, hotspots, and corrective actions. Encourage cross‑site learning by sharing heatmaps and playbooks for common failure modes (e.g., belt splices, pump cavities, quick‑disconnects).
Putting it all together: a practical rollout plan
-
Baseline assessment: Audit current SOPs, chemistry, swab sites, and historical failures. Identify gaps to worst‑case coverage.
-
Protocol design: Define allergens, acceptance criteria, sampling plan, timepoints, and statistics. Pre‑approve the plan.
-
Training: Standardize swab technique and documentation; certify operators.
-
Execution: Run three full validation cycles capturing complete metadata and controls.
-
Analysis & approval: Compare results to acceptance criteria; update SOPs; set verification cadence and sentinel sites.
-
Digitalization: Configure forms, workflows, alerts, and dashboards in your food safety platform to sustain performance.
-
Governance: Schedule periodic review and set triggers for re‑validation.
Frequently asked questions
Q: How often should we re‑validate?
A: At least whenever there is a meaningful change (new allergen, new equipment/chemistry, systemic failures). Many sites also set an annual or biennial review to confirm capability with current products and staffing.
Q: Can ATP replace allergen testing?
A: No. ATP is a great hygiene monitor, but it is not allergen‑specific. Use allergen‑specific methods to validate allergen removal.
Q: What LOD should we choose?
A: Base this on your hazard assessment, product use, and market expectations. Lower LODs increase sensitivity but may require more rigorous cleaning or more targeted sampling to avoid false confidence.
Q: How many swabs are enough?
A: Enough to confidently represent the system: typically 8–12 food‑contact sites per line (more for complex systems), plus a few adjacent‑zone sites. Sample the hardest‑to‑clean niches and replicate across multiple runs.
Q: Do we need product testing too?
A: Sometimes. Start‑up product (first‑off) testing can demonstrate there’s no carryover into finished goods after cleaning, especially for high‑risk transitions or when flushing is part of your clearance strategy.
Where digital tools help
Manual data collection and spreadsheet trending make it hard to see patterns or prove control. Modern platforms—like NORMEX—can:
-
Provide guided digital checklists for disassembly and cleaning steps.
-
Map swab sites and enforce required collection at sentinel points.
-
Capture lot/expiry for test kits and chemistry, with automatic alerts for anomalies.
-
Trend pass/fail heatmaps and time‑to‑clear across lines and sites.
-
Link validation evidence to release decisions and traceability records so you can answer customer and regulator questions in minutes, not days.
If you’d like to see how this works in practice, you can book a demo here: https://normex.ca/demo
Final thoughts
Allergen swabbing without validation is like running a race without a finish line: you’re moving, but you don’t know if you’ve arrived. A well‑designed validation program—grounded in worst‑case thinking, allergen‑specific testing, disciplined technique, and clear acceptance criteria—proves capability and builds a durable safety margin into your operations. With the right people, process, and technology, you can minimize risk, accelerate changeovers, and enable growth with confidence.
Want templates or help tailoring a protocol for your lines? Reach out and we’ll share examples you can adapt—then operationalize them with digital tools to keep results consistent over time.

