Managing temperature control in food processing is one of those topics that sounds simple on paper—“keep cold foods cold and hot foods hot”—but becomes a real operational chess match once you add real factories, real humans, and real production pressure. Temperature is the invisible variable that decides whether your product ships safely, whether shelf life holds up, whether customers love the quality, and whether regulators stay off your back. Get it right and you protect consumers and brand equity. Get it wrong and you risk recalls, waste, and reputational damage that can take years to repair.
This blog goes deep into the “why,” the “where,” and the “how” of temperature control in food processing. It then provides a practical step-by-step approach you can adapt to any facility, plus concrete examples from common food categories. The audience here is food safety professionals and food industry leaders who need both technical clarity and a business-level view of risk, cost, and control.
Why temperature control matters (beyond just compliance)
1. Microbial growth is temperature-driven
Most foodborne pathogens and spoilage organisms grow fastest in the “danger zone,” typically between 4°C and 60°C (40°F–140°F). The longer food sits in that range, the more risk compounds. A minor drift of a few degrees at a critical step can mean the difference between safe product and a microbial time bomb.
2. Temperature affects shelf life and quality
Even if a product stays microbiologically safe, temperature abuse can destroy texture, flavor, color, and functionality. Think of:
-
burnt caramel notes in dairy from overheated pasteurization,
-
mushy frozen vegetables from partial thaw/refreeze,
-
rancidity in oils from warm storage,
-
dough proofing too fast or too slowly in bakery lines.
Quality failures hit margins through waste, rework, and customer returns. For C-level teams, temperature control is a profit protection tool as much as a safety one.
3. Temperature is a core CCP in HACCP/PCP systems
In many processes, temperature is either a Critical Control Point (CCP) or tightly linked to one. Pasteurization, cooking, cooling, freezing, and refrigerated storage are classic examples. If your temperature controls fail, your HACCP plan fails.
4. Regulators focus heavily on temperature records
Temperature documentation is one of the first things inspectors ask for because it’s objective, measurable, and directly tied to hazard control. Weak records—missing checks, illegible logs, lack of corrective actions—signal weak control, even if the product is safe that day.
Where temperature control typically fails
Understanding the failure modes helps you design better systems.
-
Slow cooling
Cooked foods can be safe at the end of heat treatment but become unsafe during cooling if the temperature drop is too gradual. -
Equipment drift and calibration gaps
Sensors drift over time. Steam valves stick. Refrigeration systems lose efficiency. If calibration and verification aren’t disciplined, you won’t see the problem until it's too late. -
Human variability in manual checks
Paper logs are vulnerable to skipped checks, pencil-whipping, transcription errors, and delayed corrective actions. -
Poor airflow and cold/hot spots
Even modern chillers and ovens have zones. If airflow or loading is wrong, you get uneven temperature exposure. -
Extended holds during changeovers or downtime
Product that sits on conveyors, in totes, or in staging areas during unplanned downtime is a silent risk. -
Transport handoffs
The best internal controls don’t matter if product warms up on the dock or in third-party transport.
The temperature control chain in food processing
Think of temperature as a chain across the full production lifecycle:
-
Receiving (raw materials)
-
Storage (ambient, chilled, frozen)
-
Pre-processing (thawing, tempering, mixing)
-
Processing (cooking, pasteurizing, fermenting, drying)
-
Cooling or freezing
-
Packaging
-
Finished product storage
-
Distribution / transport
Weakness at any link exposes the whole system.
Step-by-step approach to manage temperature control
Step 1: Map your process and identify temperature-sensitive steps
Start with a clear flow diagram. For each step, ask:
-
Is safety dependent on temperature here?
-
Is quality dependent on temperature here?
-
What is the worst realistic failure scenario?
Typical temperature-sensitive steps include:
-
chilled/frozen receiving
-
refrigerated storage
-
thawing/tempering
-
cooking/pasteurization
-
cooling
-
blast freezing
-
hot holding
-
cold holding
-
distribution staging
Step 2: Define critical limits and targets
For CCPs, critical limits must be scientifically and regulatory justified. For non-CCPs, define operational targets.
Examples:
-
Milk HTST pasteurization: ≥72°C for ≥15 seconds
-
Ready-to-eat soup cooking: core ≥74°C
-
Cooling cooked meat: from 60°C → 20°C within 2 hours, then to ≤4°C within 4 more hours (typical guideline; confirm your jurisdiction)
-
Frozen storage: ≤-18°C target, alarm at -15°C
Set both limits (must not exceed) and targets (where you want to run daily).
Step 3: Choose measurement points that reflect real product risk
Measuring air temperature is not enough if product temperature can lag behind. Decide:
-
Air vs product temperature?
-
Surface vs core?
-
Static vs moving product?
For example, in a spiral freezer, air may show -25°C while the product core is still above freezing near the exit if belt speed is too high.
Step 4: Select instruments and monitoring frequency
You need the right tools for the right risk:
-
Continuous sensors (preferred for CCPs and high-risk steps)
-
data loggers
-
IoT probes
-
SCADA/BMS integration
-
-
Manual verification (good as a secondary check)
-
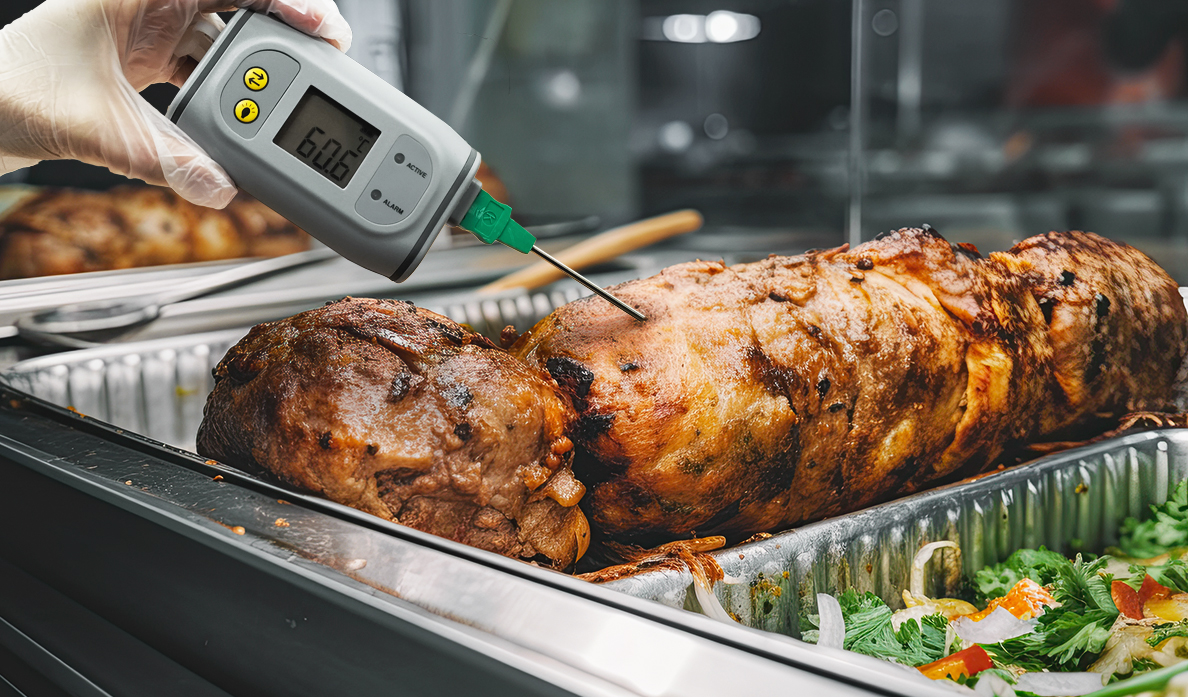
calibrated handheld thermometers
-
infrared guns (surface only—use carefully)
-
Your monitoring frequency should match the hazard:
-
continuous for cooking/cooling/storage alarms
-
per batch or per lot for smaller processes
-
per shift for low-risk ambient steps
Step 5: Validate the process
Validation proves that when you run at your limits, you consistently achieve safety.
Examples:
-
heat penetration studies in retorts
-
cooling curve validation for large containers
-
mapping cold room hot-spots
-
worst-case load validation in ovens or freezers
Validation is not paperwork. It’s your scientific insurance policy.
Step 6: Implement real-time control and alarms
The faster you detect deviation, the smaller the risk and the cheaper the fix. Real-time alarms should:
-
notify responsible roles immediately
-
show deviation size and duration
-
guide corrective actions based on SOPs
This is where « food safety software » becomes a practical advantage. Instead of discovering a problem hours later on a paper sheet, your team gets instant visibility, automated escalation, and traceable corrective action workflows.
Step 7: Train people on the “why,” not just the “what”
Operators who understand why cooling matters will move faster when a chiller fails. Training should cover:
-
the danger zone concept
-
how bacteria grow over time
-
how to take accurate measurements
-
what to do when deviations occur
-
when to stop product flow
Culture beats procedures every time.
Step 8: Define corrective actions and disposition rules
Every critical limit must have a pre-defined response:
-
hold product
-
evaluate time/temperature exposure
-
rework if safe
-
dispose if unsafe
-
investigate root cause
-
prevent recurrence
Make these decisions before the crisis. If you rely on ad-hoc calls, response will be slow and inconsistent.
Step 9: Verify and audit routinely
Verification confirms the system is working:
-
calibration checks
-
record reviews
-
direct observation
-
trend analysis
-
internal audits
Look for patterns: repeated minor drifts often predict a big failure later.
Step 10: Use data to continuously improve
Once you collect enough data, you can:
-
reduce over-processing (energy + quality gains)
-
fine-tune cooling rates
-
predict equipment failure
-
optimize set points for shelf life
-
benchmark lines and shifts
That’s when temperature control evolves from defensive compliance to strategic operations.
Practical examples by product category
Example 1: Ready-to-eat cooked meat (high risk process)
Key temperature steps:
-
Cooking CCP
-
Cooling CCP
-
Refrigerated storage
-
Distribution staging
Typical control approach:
-
Continuous core temperature monitoring in ovens; validate the slowest heating product/location.
-
Use data loggers or integrated probes to confirm time-at-temperature.
-
After cooking, move product immediately to blast chillers. Validate cooling curves for worst-case load.
-
Cold room continuous sensors with alarms, plus manual shift verification.
-
Staging time limit at dock (ex: max 30 minutes out of refrigeration).
Common failure:
Cooling is delayed because racks wait for space in chillers.
Fix:
Add staging rules, limit batch size, or adjust chiller capacity planning.
Example 2: Dairy pasteurization (precision + documentation heavy)
Key steps:
-
Raw milk receiving temperature
-
Storage tank temperature
-
HTST pasteurization CCP
-
Post-pasteurization chilled holding
Control approach:
-
Temperature on receipt must stay within spec to prevent raw microbial load spikes.
-
Milk tanks with continuous probes and CIP-compatible sensors.
-
HTST system with legal recording thermometers; verify flow rate and holding tube design.
-
Immediate cooling to ≤4°C after pasteurization.
Common failure:
Sensor drift causes recorded temps to look compliant while actual temps are slightly low.
Fix:
Tighter calibration schedule + cross-checks against reference thermometers.
Example 3: Frozen vegetable processing
Key steps:
-
Blanching (quality + sometimes safety)
-
Rapid freezing
-
Frozen storage
-
Transport
Control approach:
-
Validate blancher temperature and residence time to stabilize enzymes.
-
Freezer belt speed tuned to achieve core freezing before exit.
-
Storage at ≤-18°C with alarms.
-
Transport with reefer data logs reviewed on receipt.
Common failure:
Partial thaw during loading/unloading leads to refreeze and texture loss.
Fix:
Dock discipline, strip curtains/airlocks, shorter transfer windows.
Example 4: Bakery with proofing and cooling constraints
Key steps:
-
Dough proofing temperature (quality)
-
Baking core temperature (safety for some fillings)
-
Cooling before packaging (quality + mold prevention)
Control approach:
-
Proofers controlled to prevent over-fermentation.
-
Baking validation with core temperature checks for filled products.
-
Cooling racks with airflow management; packaging only once product is below a target (ex: ≤30°C).
Common failure:
Packaging too hot causes condensation → mold.
Fix:
Hard rules on cooling endpoints + monitored cooling times.
Technology and system maturity
Manual systems can work in small operations, but as volume grows, paper becomes a bottleneck:
-
too slow to detect deviation
-
too easy to falsify or forget
-
too hard to analyze trends
-
too costly in audit prep time
Modern temperature programs increasingly rely on automated monitoring and connected workflows. The win is not just convenience; it’s risk reduction and better decision speed.
Final takeaways
-
Temperature control is a chain, not a checkpoint.
-
The biggest risks hide in cooling, staging, airflow, and human variability.
-
A strong system combines validated limits, real-time monitoring, disciplined corrective actions, and verification.
-
Data turns temperature control into an efficiency and quality lever, not just a safety cost.
-
Automation and « food safety software » make control faster, cleaner, and more audit-ready at scale.
Want to see what real-time temperature control looks like?
If you’d like to modernize how your site monitors temperatures, assigns corrective actions, and generates audit-ready records automatically, book a quick demo here:
https://normex.ca/demo
You’ll see how a connected temperature program can reduce risk, cut waste, and make compliance feel a lot less painful.

